Your legacy, secured in nine simple steps.
This guide walks you through the whole journey, from your first sign in and identity check, to organising your assets, mapping your wishes, and handing over the keys. No jargon, no guesswork. Follow it top to bottom and you will have protected your legacy for the people you love.
The whole path, on one page.
Here is everything you will do, in order. Tap any step to jump straight to it.
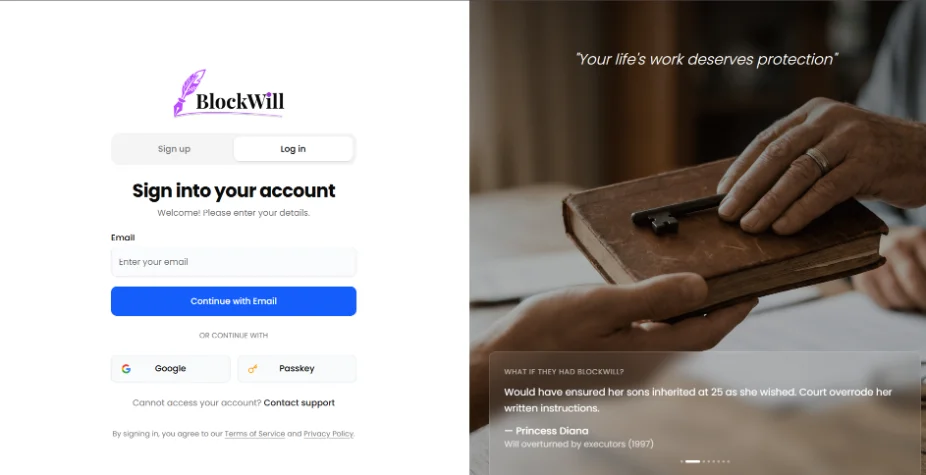
Open your invite and sign up
Your journey starts with a private invitation from BlockWill after the purchase. Open the link, set up your sign in, and you will land on your personal dashboard. There is nothing to download and no password to remember.
- Open the secure invitation link sent to your email. It is unique to you and expires after 48 hours.
- Set up your sign in using your email on which you got the invitation link or Google Sign On.
- Once you are in, you will see your dashboard. This is your home base for everything that follows.
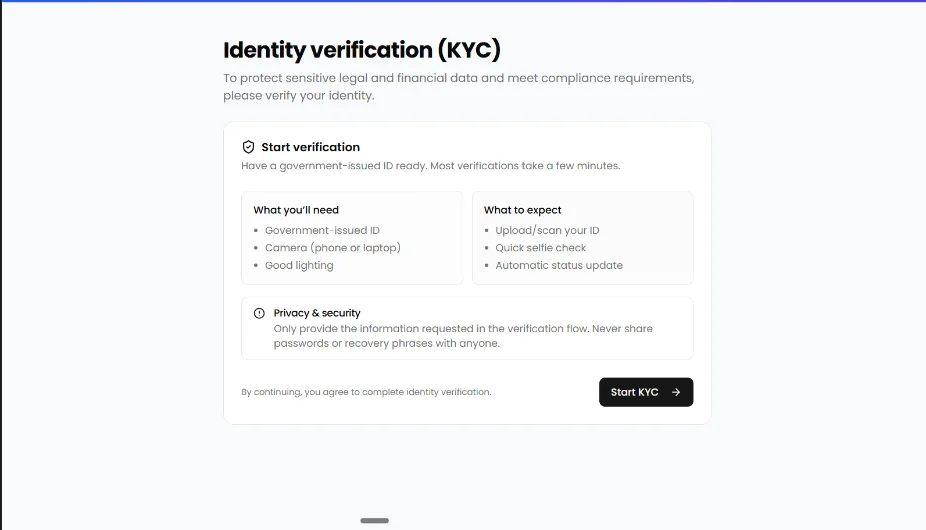
Verify your identity (KYC)
Before you store anything, BlockWill confirms that you are really you. This one time identity check, known as KYC, keeps your estate plan legally sound and stops anyone from impersonating you. It usually takes just a few minutes.
- Have a government issued photo ID ready. A passport, driving license, Social Security ID, Aadhaar ID, or any other national ID card. Accepted documents depend on your country. We recommend to use phone camera for KYC.
- Take a clear photo of your ID, then a quick live selfie when prompted. The selfie confirms the ID belongs to you.
- Submit, then wait for approval. Most checks clear within a few minutes and you will get an email once you are verified.
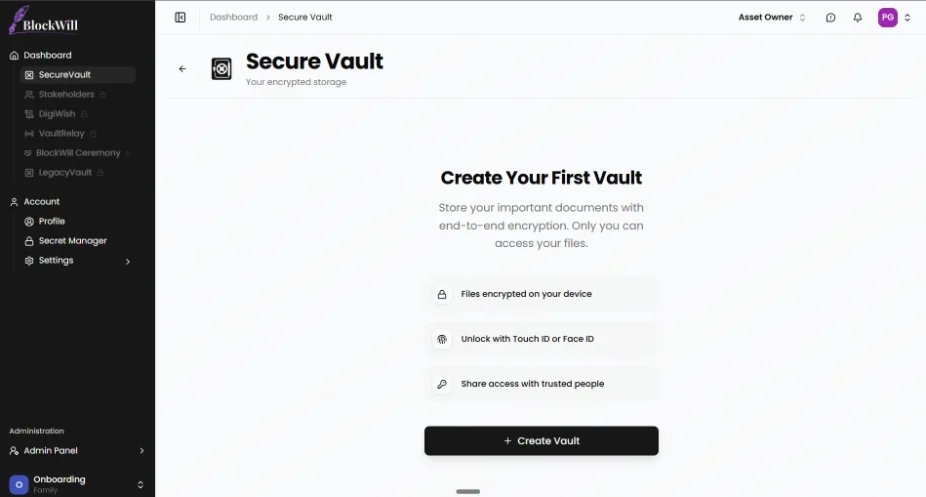
Create your SecureVault
Your SecureVault is the encrypted home for everything you want to protect. Give it a name and it is ready. Everything you add from here on lives behind military grade encryption.
- From your dashboard, select Create Vault.
- Give your vault a name you will recognise, for example "Family Estate" or "Personal".
- Your vault is protected with AES 256 encryption, the same standard trusted by banks and governments.
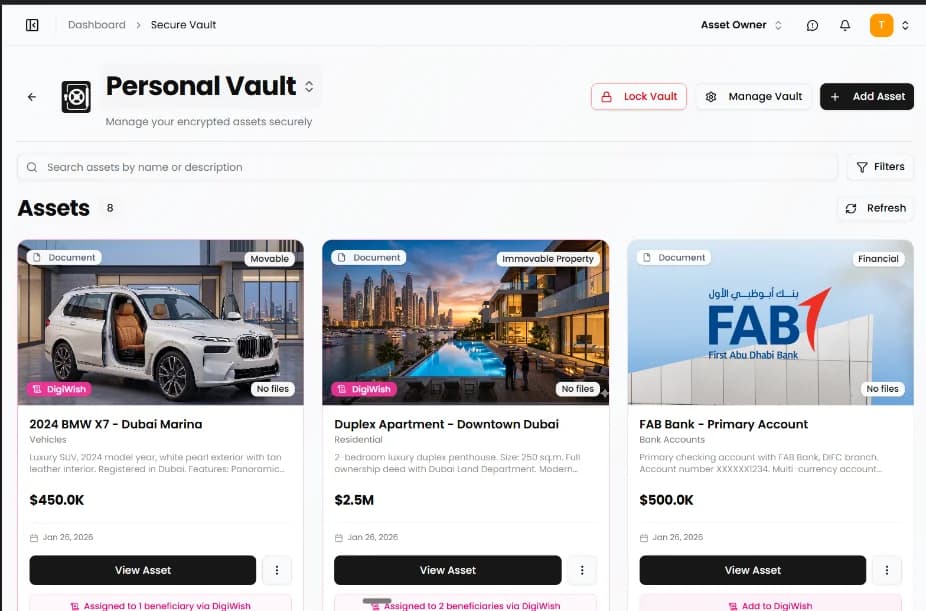
Fill your vault with what matters
Now add the things you want to protect, and where it helps, upload the documents that prove them. You can sort everything into clear categories so it is easy to find later.
- Select Add Asset and pick a category: property, bank and investment accounts, crypto, insurance, business, or personal items.
- Enter the details and upload any supporting documents, such as a deed, policy, invoice or statement.
- Assets which are Trust and Wills receive a blockchain backed Certificate of Immutability, proof that it has not been altered or tampered with.
- Add as many assets as you like. You can always come back and update them.
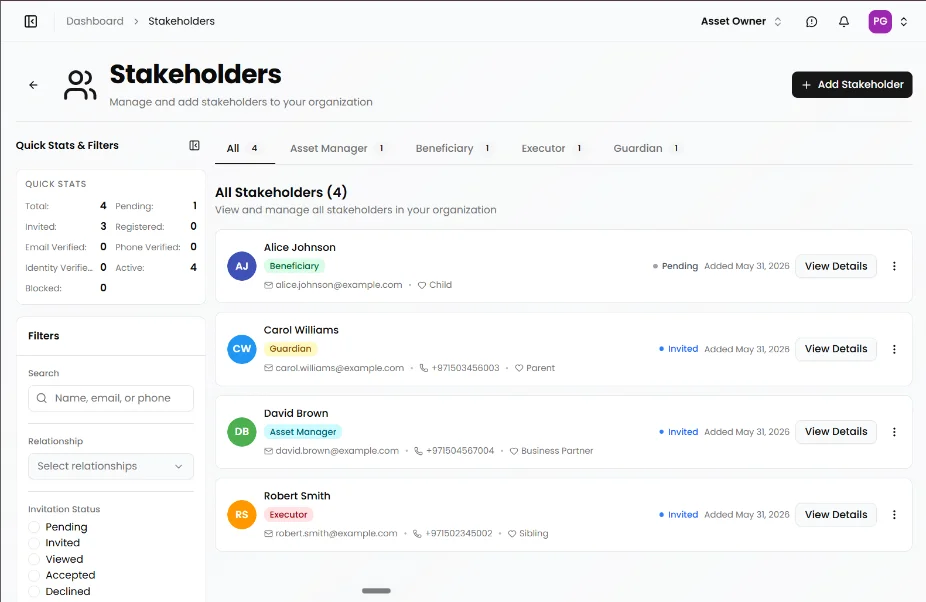
Add the people in your estate plan
Stakeholders are the people who matter in your estate plan. Add them once now, and you can decide later exactly what each person can see and do. BlockWill supports four roles.
- Select Add Stakeholder then choose a role: Executor, Beneficiary, Guardian, or Asset Manager.
- Enter their name, email, phone number, date of birth and relationship to you.
- Each person receives a secure invitation to set up their own BlockWill access.
- Not sure who does what? See the simple roles guide further down this page.
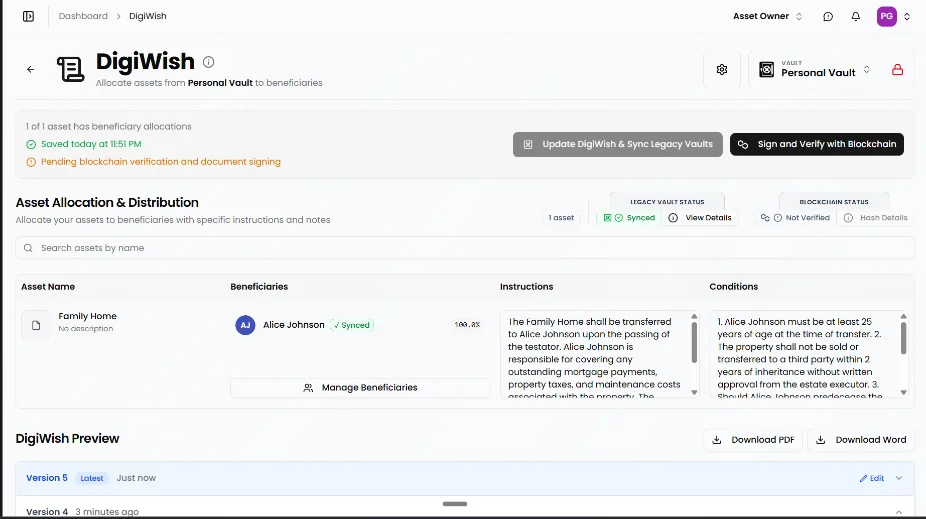
Map your wishes
This is where you decide who receives what. Asset Allocation is powered by DigiWish, your digital directive. You make your wishes clear, and the system records them securely and permanently.
- Select an asset, then choose which beneficiary or beneficiaries should receive it.
- Split an asset by percentage if you want more than one person to share it.
- Add notes or instructions, for example guardianship for children or a gift to a cause you care about.
- Your choices are saved as your DigiWish, and the document hash is recorded on the blockchain as proof of your intent.
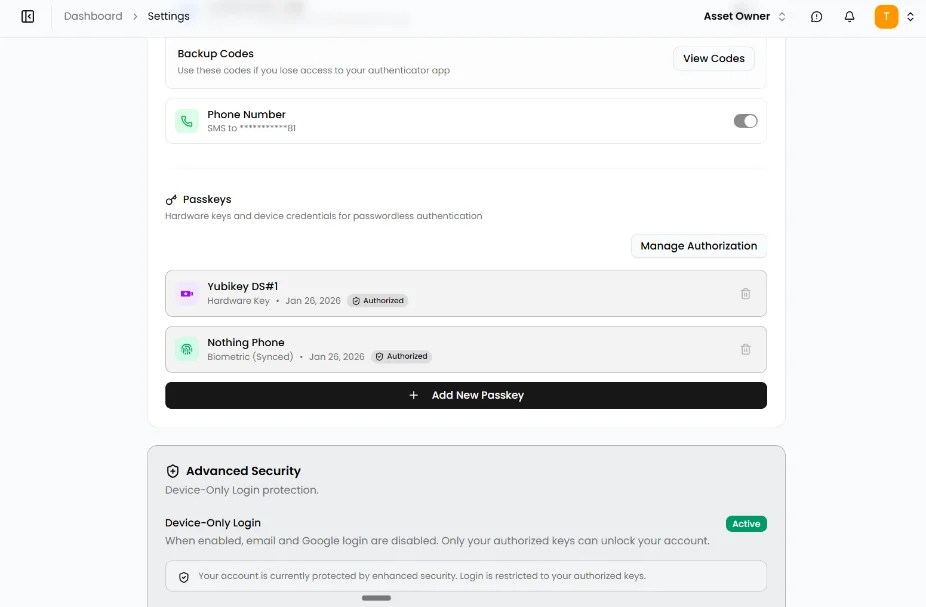
Lock it down with a passkey
A passkey is a fast, password free way to prove it is you, using your fingerprint, face, or a security key. Adding one, plus a backup, keeps your account both safe and easy to reach.
- Go to Settings, then Security, then Passkeys.
- Register your main device with your fingerprint or face, for example Face ID or Windows Hello.
- Add at least one backup, such as a second device or a hardware security key like a YubiKey.
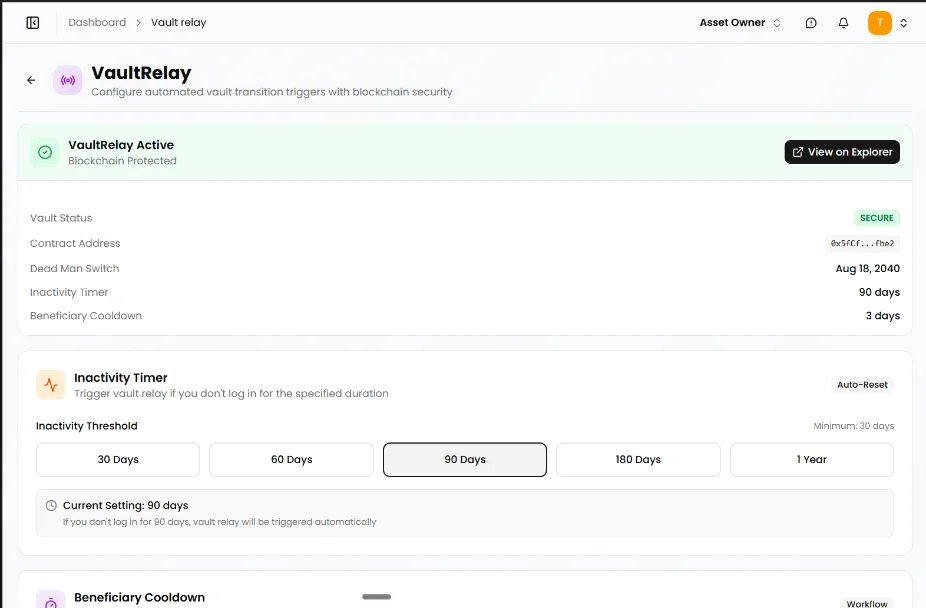
Set Your Triggers
VaultRelay is one of the most important steps. It makes sure the right people receive the right information at the right time. You choose how it is triggered, then switch it on.
- Manual Trigger: your chosen Executor(s) starts the handover when the time comes. BlockWill caters not only to a death scenario, it also caters to events such as incapacitation and missing person.
- Inactivity Trigger: if you do not log in for a period you set, BlockWill notifies you and if no word is received from you, then your Executor(s) to begin.
- Dead Man's Switch: on a date you set, your information is sent straight to your beneficiaries, with no other action needed.
Complete the BlockWill Ceremony
This is the step that makes everything else work. BlockWill is zero knowledge, which means only the holder of the key can open a vault. Not even BlockWill can open it for them. So you, the asset owner, must personally hand the keys to your beneficiaries and guardians, and write down that you have done it. Nothing is left to chance.
- Give each beneficiary and guardian their key: either the BlockWill Secret or a YubiKey hardware device. In person is best.
- Open BlockWill Ceremony from your dashboard and record the handover date for each person.
- Note who was present as a witness, for example a family member or attorney, and add any instructions, such as where the key can be found if you did not hand it over directly.
- Repeat for everyone until the Ceremony Completion Progress bar shows every person documented.

Protection built in at every step.
You do not need to be technical to be secure. BlockWill handles all of this for you, quietly, in the background.
Zero knowledge
Only you, and the people you choose, can view your vault. BlockWill employees never can.
AES 256 encryption
The same military grade encryption used by banks and governments protects your data.
Passwordless sign in
FIDO2 and WebAuthn mean your fingerprint or face is your key. There is no password to steal.
Blockchain proof
Every DigiWish document gets a Certificate of Immutability, lasting proof it has not been changed.
Three parts, one complete plan.
Everything you set up in this guide fits into three connected pillars. Here is the short version.
Your vault
The encrypted home where you store and organise all your assets and important documents.
Your wishes
Your digital directive. It records who receives what, recorded on the blockchain as proof of your intent.
Your delivery
The smart relay that sends the right information to the right people at exactly the right time.
Five clearly defined, least-privilege roles make it work.
Each role sees only what it requires, and every action is logged.
Owner
Holds the vault and grants every other role. Sets what exists, who inherits and when access is released, with full visibility and a complete log of every action.
Asset Manager
maintains the living registry- Delegated by the owner to add and update assets
- Scoped per vault (e.g. one manager per jurisdiction)
- Cannot view beneficiary mappings or release triggers
- Every change is logged
Executor
governs the release event- Confirms the triggering event: death, incapacity or missing
- Initiates VaultRelay release
- Primary and secondary Executors supported
- Actions are logged and subject to the cool-down period
Beneficiary
receives their inheritance- Receives only the assets and instructions meant for them
- Information lands in their personal Legacy Vault
- Direct assignments possible (e.g. specific assets to one heir)
- Receives the DigiWish document and owner KYC on release
Guardian
stewards a minor beneficiary's share- Nominated for a minor beneficiary
- Receives and holds the minor's information securely
- Steward until the minor comes of age
- Verified and witnessed via the BlockWill Ceremony
Ready to begin your nine steps?
Pick a plan and get set up in minutes.
We are here to guide you through every step of your onboarding and beyond. If anything is unclear, reach out and our client success team will help.
Select the Report a Problem icon in the top bar of the app, on any screen. Describe what happened, attach a screenshot if it helps, and our team will look into it. You will get updates on your report through email.
Application
Office
Hours